Welcome to Relaxed Farming
- Alpacas
- Chickens
- Dairy Goats
- Ducks
- Geese
- Pigs
- Pygmy Goats
- Quail
- Rabbits
- Sheep
- Turkeys
- Polytunnel
- Photo Stories
- Video Stories
- Food
- Smallholding Map
The Relaxed Farming Polytunnel: The polytunnel build
|
All about the polytunnel
Click to read more
|
The polytunnel build
See below
|
The polytunnel plan
Click to read more
|
The polytunnel year
Click to read more
|
The planting year
Click to read more
|
| Planning | Uprights | Frame | Cultivating | Trench | Doors | Covering 1 | Covering 2 | Fitting | Raised beds | Compost | Finished! |
|
Frame
The top curved bars are now in place and in the photo below David is fixing the straight bars which go from the front to the back of the polytunnel. At this stage everything was very wobbly, and remained so until all the straight bars were in place and the fittings tightened up. If you look at the right side of the photo you will see a diagonal in place from the first upright to the second. There needs to be one like this on each corner of the polytunnel to help make it a rigid structure. A triangular structure (in this case the vertical bar, diagonal bar and ground) is much stronger than a square one.Whilst only 2.5m tall the top bars were out of reach, and we had to pop up and down the ladder to tighten each set of bolts! Again you may be able to see the orange string running down each side (just at the top of the uprights) which gave us a straight line to work to when setting the height of each roof bar. 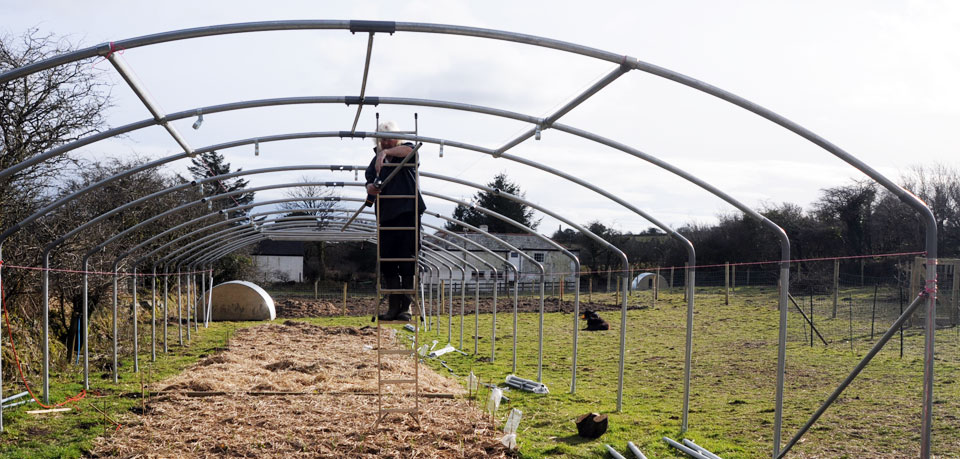 |