Welcome to Relaxed Farming
- Alpacas
- Chickens
- Dairy Goats
- Ducks
- Geese
- Pigs
- Pygmy Goats
- Quail
- Rabbits
- Sheep
- Turkeys
- Polytunnel
- Photo Stories
- Video Stories
- Food
- Smallholding Map
The Relaxed Farming Polytunnel: The polytunnel build
|
All about the polytunnel
Click to read more
|
The polytunnel build
See below
|
The polytunnel plan
Click to read more
|
The polytunnel year
Click to read more
|
The planting year
Click to read more
|
| Planning | Uprights | Frame | Cultivating | Trench | Doors | Covering 1 | Covering 2 | Fitting | Raised beds | Compost | Finished! |
|
Doors
A few hours was spent in the workshop making the doors. The photo shows them held in place with a bit of twine whilst the hinges were screwed on the inside of the door frame and the bolts fastened on the outside. As with all rectangular shapes (see the Cultivating page about strengthening the polytunnel frame with diagonal tubing) the door frames also needed strengthening, and we used plywood for this for the bottom half of each door. This was screwed in place with a little bit of outdoor glue to make the door rigid - we do not want the door to 'drop', i.e. get lower on the side away from the hinge, as this would make it difficult to open and close. The top half of the door had butterfly and moth netting to stop these and other insects from entering the polytunnel. We then waited for a warm and still day to put the polythene onto the polytunnel - if we had tried to do this on a windy day we would have had problems, and probably a very expensive kite with a lot of people trying to hold onto it!! The polythene to cover the polytunnel was 28m long and 14m wide and weighed about 45kg but a strong-ish wind could easily have lifted it!!! 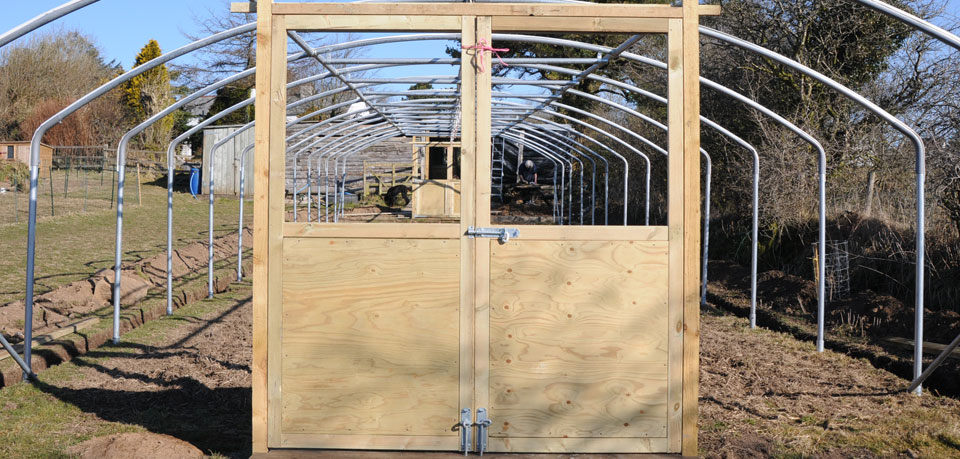 |