Welcome to Relaxed Farming
- Alpacas
- Chickens
- Dairy Goats
- Ducks
- Geese
- Pigs
- Pygmy Goats
- Quail
- Rabbits
- Sheep
- Turkeys
- Polytunnel
- Photo Stories
- Video Stories
- Food
- Smallholding Map
The Relaxed Farming Polytunnel: The polytunnel build
|
All about the polytunnel
Click to read more
|
The polytunnel build
See below
|
The polytunnel plan
Click to read more
|
The polytunnel year
Click to read more
|
The planting year
Click to read more
|
| Planning | Uprights | Frame | Cultivating | Trench | Doors | Covering 1 | Covering 2 | Fitting | Raised beds | Compost | Finished! |
|
Cultivating
The door frame was loosely tied in place at each end of the polytunnel, and we then rotivated (turned over and mixed) the soil and the compost to help give us a good depth of soil for when the beds go in. Our two wheel tractor is a real help on the smallholding - we are far too small for a normal tractor, yet still need heavy jobs doing such as rotivating (otherwise known as cultivating), flailing (using short hooks which cut long grass to within 10cm of the ground) and pulling pig arks across the smallholding from one paddock to the other. As with all smallholdings and farms one needs to be very aware of the dangers present - the two wheel tractor is a powerful beast and if used incorrectly may cause a lot of harm! You may be able to see that David is wearing ear protectors as this machine is quite noisy, and he is also wearing strong boots to protect his feet.The roof bars in the polytunnel were an extra we believed would come in useful - these are the horizontal bars near the top of the polytunnel just below the top curved bars. The roof bars added extra strength to the polytunnel structure by making the frame stiff. We also planned to use the roof bars to tie supporting canes, pea netting, etc, together with a host of other things we hadn't even thought of!! 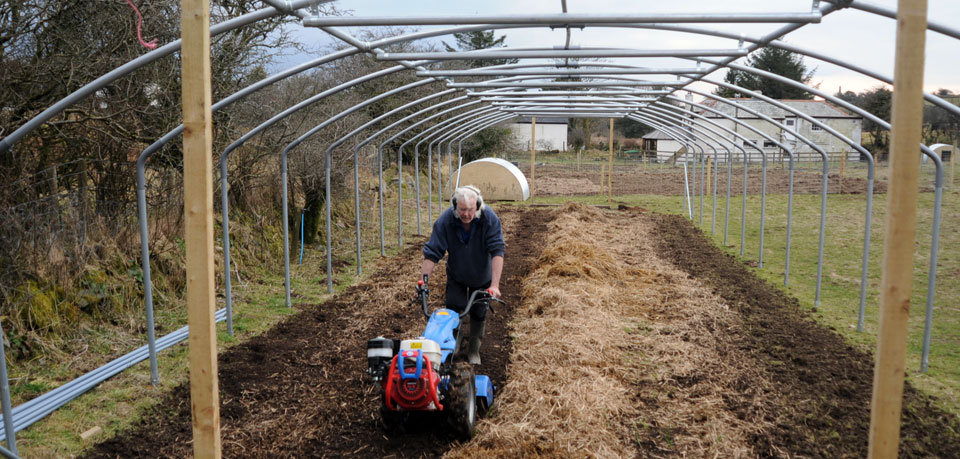 |