Welcome to Relaxed Farming
- Alpacas
- Chickens
- Dairy Goats
- Ducks
- Geese
- Pigs
- Pygmy Goats
- Quail
- Rabbits
- Sheep
- Turkeys
- Polytunnel
- Photo Stories
- Video Stories
- Food
- Smallholding Map
The Relaxed Farming Polytunnel: The polytunnel build
|
All about the polytunnel
Click to read more
|
The polytunnel build
See below
|
The polytunnel plan
Click to read more
|
The polytunnel year
Click to read more
|
The planting year
Click to read more
|
| Planning | Uprights | Frame | Cultivating | Trench | Doors | Covering 1 | Covering 2 | Fitting | Raised beds | Compost | Finished! |
|
Compost
Once the raised beds were in place, screwed together with supporting stakes to make them strong, we started to fill them with well rotted-compost, and they needed an awful lot of it - on average 20 wheel barrow loads for each narrow bed along the sides (there are six of these) and 35 or so for each of the middle beds, of which there are three!The compost we used was from our own compost heap: on the whole this was made up of the waste from the animals' houses and stalls (straw bedding full of poo and wee). Compost heaps made from animal bedding need to get very warm to ensure that bugs and beasties are killed off and fortunately ours does. Over the winter we often come down to the smallholding to see the compost heap steaming - we sometimes dig into it to see how things are going, and the heat from the rotting material is often too hot to touch!! Whilst the composting process will kill a lot of the nasty bugs off we are very aware that there may still be bugs that might cause funny tummies so we always thoroughly wash any produce from the polytunnel and when we plant crops that we eat raw/will not be cooked (e.g. salads etc), we cover the top of the compost in their beds with commercially produced peat free compost with no nasties in at all. We do not want to have funny tummies! 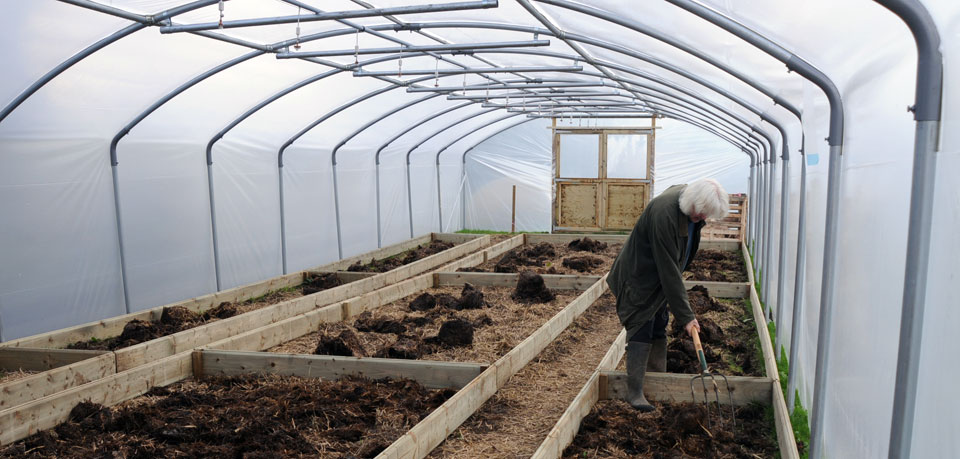 |