Welcome to Relaxed Farming
- Alpacas
- Chickens
- Dairy Goats
- Ducks
- Geese
- Pigs
- Pygmy Goats
- Quail
- Rabbits
- Sheep
- Turkeys
- Polytunnel
- Photo Stories
- Video Stories
- Food
- Smallholding Map
The Relaxed Farming Polytunnel: The polytunnel build
|
All about the polytunnel
Click to read more
|
The polytunnel build
See below
|
The polytunnel plan
Click to read more
|
The polytunnel year
Click to read more
|
The planting year
Click to read more
|
| Planning | Uprights | Frame | Cultivating | Trench | Doors | Covering 1 | Covering 2 | Fitting | Raised beds | Compost | Finished! |
|
Covering 2
It only took half an hour or so to get the polythene over the frame but then we had a very loose and baggy covering which needed tightening by pulling and weighing down the sides and ends. We made sure the polythene that came down the side of the polytunnel frame was draped into the trench and then out again. We then shovelled the earth into the trench and so onto the polythene to weigh it down whilst the loose bits at the ends were then pulled into folds or stapled to the ends near the doors.It was a really exciting moment when the polythene was in place - we had nightmares of us all flying away holding tight to the polythene. The first thing we did was to walk inside the polytunnel and experience the instant warmth! And then we walked out as we were too hot!! The technique to tighten it was to pull up the loose end of the polythene away from the side, then add a few shovels full of soil to weigh down the vertical part of the polythene, and then move on to the next bit. The people who sell polytunnels say that the polythene should be 'drum' tight, but this depends upon the temperature - a warm day will make the polythene stretch, cold days shrink. As we were doing this work in mid-March we felt we were not too cold or too hot, so we tensioned the polythene quite tight. 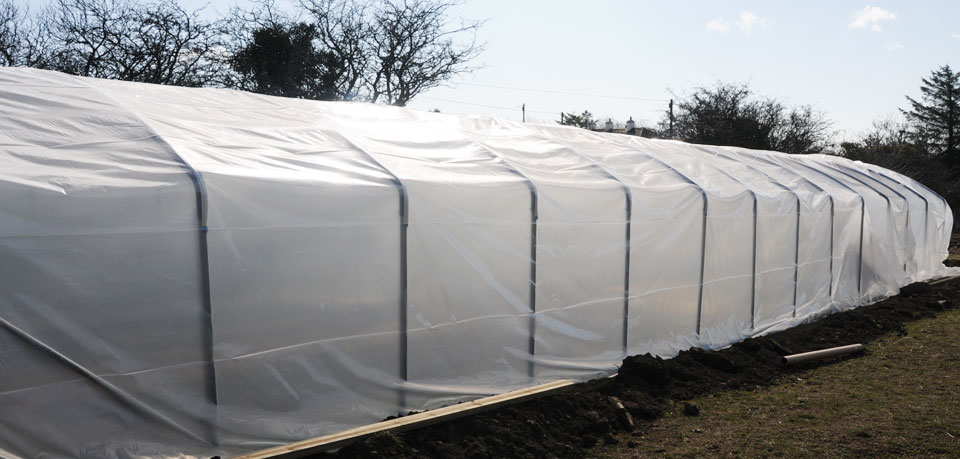 |